
Probably the most important step in one’s Farm House journey!
Selection and Purchase
It helped I am not completely unfamiliar to the rural area where we wished to purchase the land. A friend who had his ears to the ground on lands available for sale helped me with the handshake. I used Google Earth to get a sense of the land and it’s surroundings.
If you are new to buying farm land, it surely helps to find a reliable local-contact who can help you with the process. It is important someone reliable or yourself do these:
- Speak and work directly with the land-lord. Usually, when a land-lord wishes to sell, locals who are more aware of the intent enter into an agreement on paper to buy it at a certain price and they in-turn try to sell it at a higher price. There can be chains of such agreements too! It is best to directly deal with the Owner of land on whose name land is currently registered.
- Ensure Approach Road/Access to land is good. And free of disputes.
- Enquire and confirm if monsoon rains can create any water logging in the farm – depending on your plan for the farm.
- Vet the precedents of the land ownership. There is a website managed by Govt of AP which provides a chain of past ownership changes against a survey number. You should check such resources. One hopes future digitization of land records can simplify and bring more transparency to agricultural land purchase.
- Enquire in the local Registrar office to ensure the land and the survey number it belongs to is clear of any issues and “registrable“.
- Checking with the local Land Surveyor (you can ask for him in the local MRO Office) also helps a lot in vetting the survey number details.
- I assumed Lat/long co-ordinates are used in Registration documents to establish your land boundaries. This is so not the case. The document merely mentions whose lands are in NSEW sides of the land you are buying. This can be tricky and one hopes all is well in the end! Do make sure the Writer of your Registration Document captures all this information well.
While we bought 1/3rd of an acre (15 guntas in local parlance), the purchase costs per acre can vary widely depending on the location of land. You can expect an acre to cost anywhere from 5 lakhs to 30 lakhs. Any costlier, the land may be more a part of real estate speculation than real value?
We were fortunate to have another 1/3rd acre adjacent to the land available for our farming (bought by a friend). Looking at the two plots, I can say 2/3rd to 1 acre of land is an ideal size for dwelling and farming.

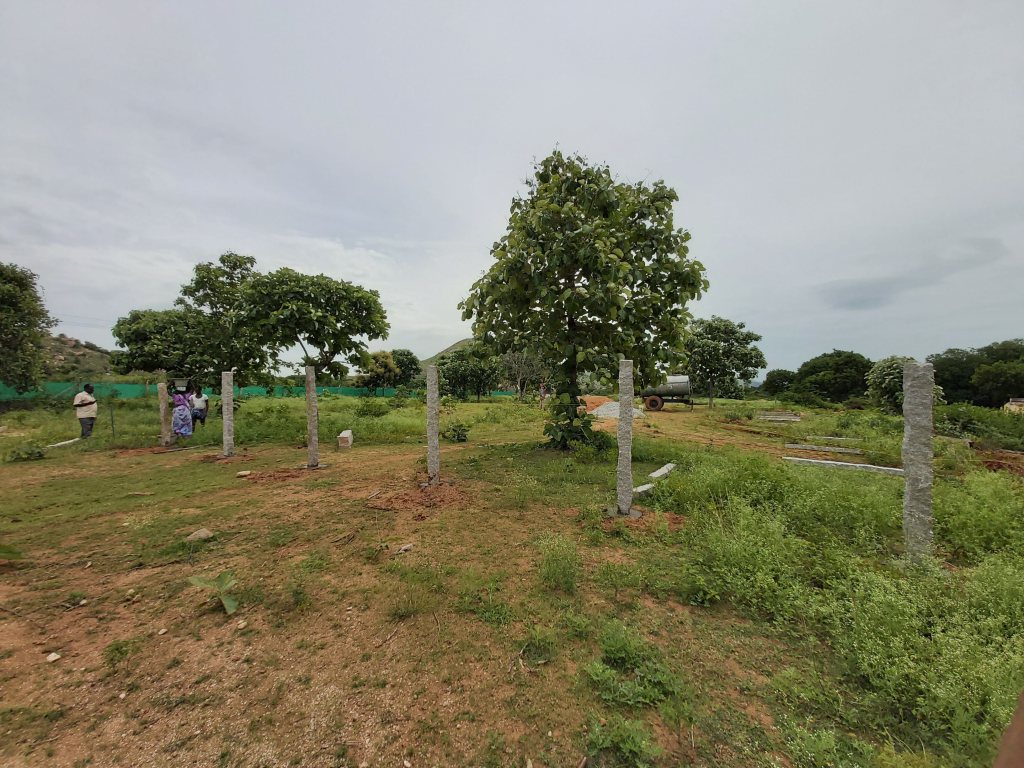
Marking the boundaries
The land I purchased has no pre-existing fence or markings. I had to take help of the local land surveyor to provide the markings. This process unfortunately took couple of months for multiple reasons – a busy surveyor plus time he took to collect some survey maps of an adjoining canal for reference. I used some GPS enabled apps on my mobile to mark and measure the land after the survey work to ensure everything looks good.
Access/Approach to Land
One of the important checks you do before buying farm land is ensuring there is un-disputed path/access to your land. With adequate width for a tractor or a Lorry to move on. We were fortunate to have this in form of canal road that dots the both sides of the Handri-Niva canal in front of the land.
Heavy rains can make the use of this road difficult. Some tracts especially needed gravel/sand to be poured in to make them usable.
Levelling the Land
Some pre-existing debris (mostly dumped during canal construction) had to be removed with the help of an Earth Mover and four tractors. Hiring an earth mover costs by the hour, usually 700 INR per hour (in 2020). Local tractors charge per load they carry. This can range from 200 to 500 INR depending on how far they are travelling to unload the debris. We ended up spending upwards of 30k INR for levelling the land. This plus access road repairs can be a significant cost factor to be kept in mind when you inspect lands for purchase.
Many also suggest levelling land such that rain water flows towards North East corner of the site. I am yet to understand this but the suggestion comes from Vaastu Shastra.
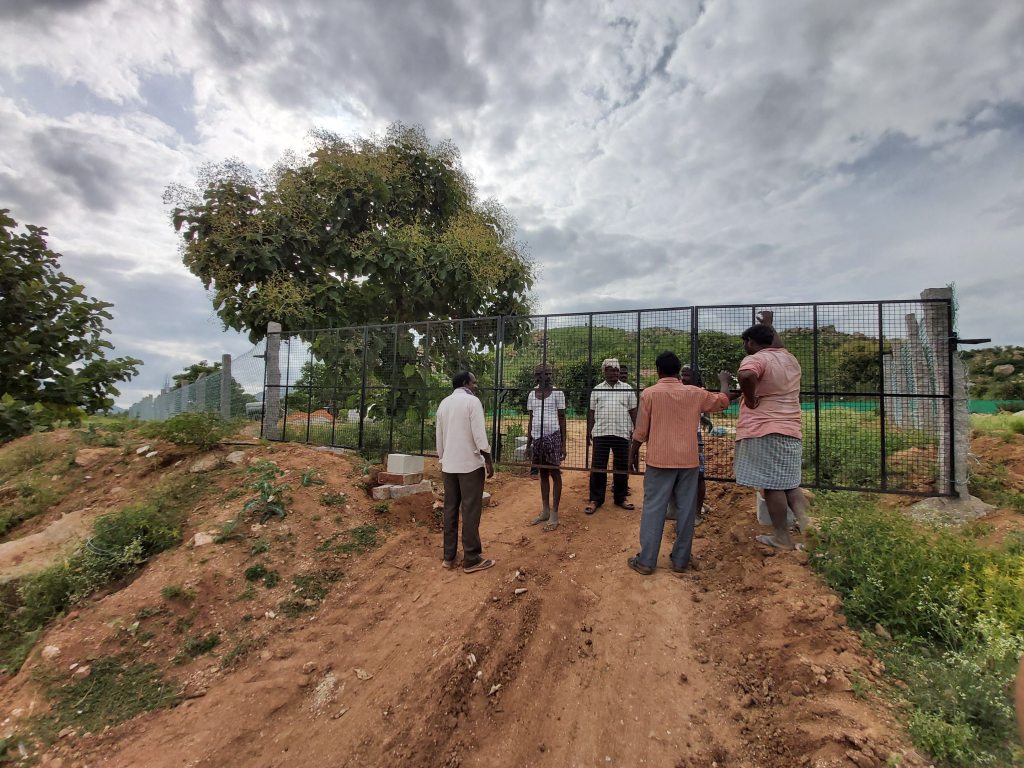
Fencing the Land
Why fence at all? There can be some practical reasons. Many goat and cow grazers take their flock through the land daily. If one is farming, they need to be kept out. Trespassing can be contained too. You do not want a child or a goat fall into a half dug well/pit and injure themselves. Construction sites with steel bars and other material lying around are also not exactly child safe places. Fencing can sometimes be a responsibility act too.
I tried looking for eco-friendly options to fence the land. But given the location and other constraints, we finally ended up using Tata Wiron Aayush D-Fence Chain link mesh with stone pillars available locally (an alternative to stone pillars are steel pipes from Tata Steel or other brands). Tata Wiron mesh is usually available with your local Tata Steel vendor/agency. The agency also takes orders and procures the mesh. It is also possible to order directly on Tata Steel’s Aashiyana portal or maybe their Neu app soon!
Getting the fence installed is also my first experience with the people management complexities involved. One team only digs pits for the stone pillars. Another team only supplies the stone pillars. Yet another team moves the pillars to the pits. After you ensure water tank, cement, sand and gravel is available at site, a mason and his team installs the pillars. Finally, another team comes and installs the chain link fence.


It can cost 1 Lakh INR and upwards to fence one acre of land. And that does not include the cost of metal gates and their installation!
Installation of gates is a more complicated process. A gate with desired design should be ordered and this can take couple of weeks. Foundation pillars need to be built before placing the gates. We worked on this when foundation work began for main house. A temporary gate worked for us till then.
Water
Access to water is probably the most important land development milestone after fencing. What are one’s options?
It is possible to just construct a sump tank (maybe 10k litre capacity) and have it occasionally filled with water tankers (tankers pulled by tractors come in 5k litre capacity). One issue with this arrangement is you cannot guarantee quality and non-contamination of water. And you will need a reliable supplier who can refill water the same day you make the request. They usually charge 500 INR per refill but this can be more if your land is far away from the supplier’s borewell.
A sump is an underground (or partially underground) tank that is popular in India. It is usually used for large water tank storage and can be built cheaply using cement-like materials. It is usually part of a rainwater harvesting system, where the rainwater gets channeled into the tank, then pumped out for use.
If a neighbouring farmer already has a borewell and if he/she is willing to supply water to your farm, that is a possibility too.
Our initial idea is to build a sump tank and refill with tractors. This approach requires little up-front investment (50k for building a 10k litre sump tank). But there are some issues to consider. When and if we later decide to go with a borewell, what if the best borewell location is where the house is already constructed? Or worse, what if the borewell location identified is so close to the house and the drilling process affects the structural stability of the house?
After all these deliberations, identifying the location and drilling a borewell immediately proved to be a practical step. There is however the risk of not finding water and still spending money for the drilling.
I had two options for identifying the borewell location. Use a local water diviner and/or call a Geologist who has experience mapping borewell locations in the area. I used two water diviners and one Geologist. The water diviners agreed on one location and the Geologist suggested another location a few meters away. On a hunch, I finalised the location suggested by the local water diviners.
On the appointed date, the borewell drilling team arrived in two lorries. One to carry a DG Set and another with the required drilling equipment. It is important you check with them the site is accessible for these huge vehicles.
We struck water at around 400 ft but the drilling went on till 720 ft. The work is completed with installation of a 50 ft casing and a cap. The casing is a PVC pipe installed from ground level to 50 ft below to prevent caving in of the borewell. The cap on top prevents objects falling into the borewell. It’s an important safety measure.
Local practices require animal sacrifice when water is struck. But I could persuade them to not do this for us.


It costed us close to 1 Lakh INR for the borewell drilling work. This includes service fee to the water diviners and Geologist. In some cases, drilling may have to go on up to 1000 ft. Your costs will vary if that is the case as drilling costs are per ft basis and they rise with each 100 ft. You pay less for first 100 ft and more for, say, 700 to 800 ft.
Installation of pipes and submersible motor into the borewell had to wait till there is electricity on the farm.
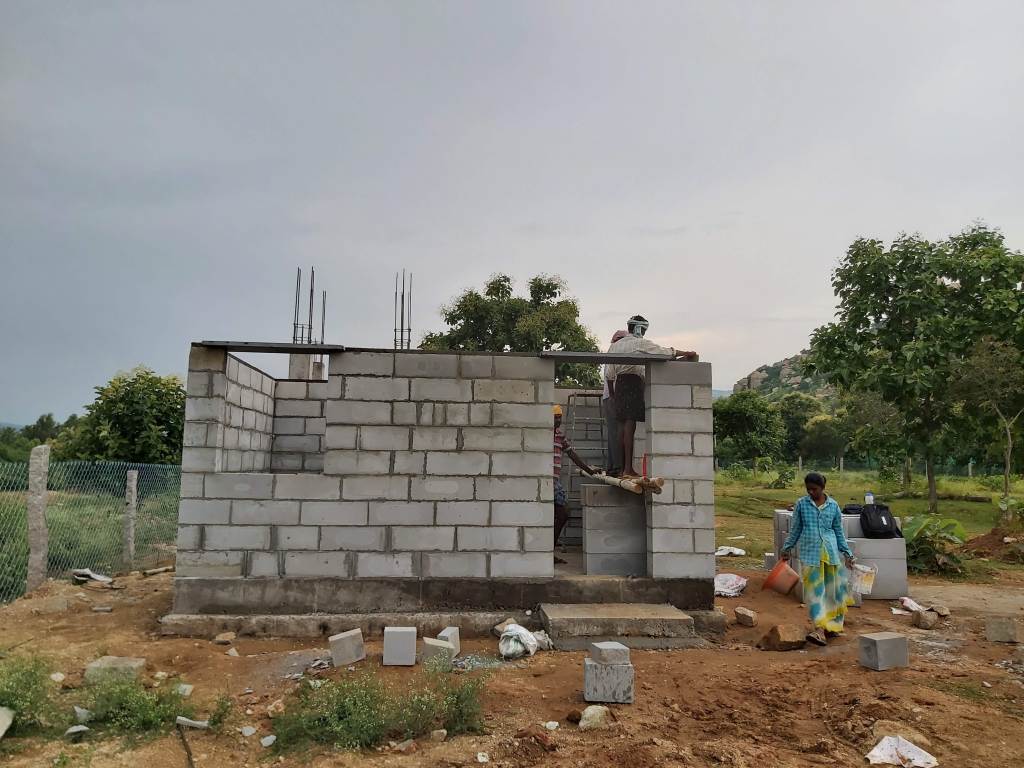
Building a Shed
Along with fencing work, we started work on building a shed. The shed (or any temporary structure) helps in getting an electric connection easily. AP State regulations require some structure at site before an electric connection is provided. The shed also served the purpose of storage for construction tools and material, especially, covered space for storing cement.
We used locally available AAC blocks for the walls and metal sheets for the roof (JSW Colouron+). We spent some time researching on the benefits of AAC blocks over using concrete cement bricks or red bricks made locally. That they might keep the room cool in summer and have better acoustic insulation helped us tilt towards their use. Birla Aerocon is a branded AAC block but they are costlier than local manufacturers.
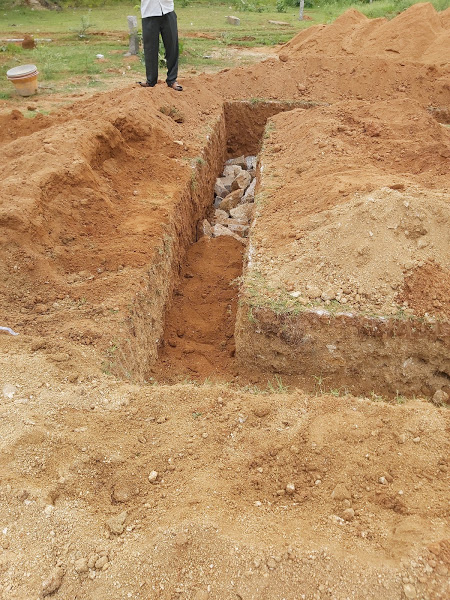
Building the shed was a first experience in construction. We started by marking and digging the foundation.

And filled them up to a level with what is locally called picchi rai, then with mud and water.

Bond rocks are placed on top and concreted.
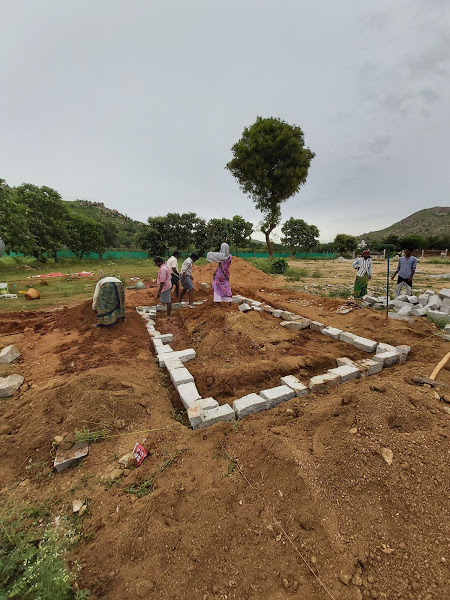

Steel reinforcement is placed on this and using a framework, plinth beam is completed.
The plinth beam is a reinforced concrete beam built between the wall and its foundation. The plinth beam is provided to prevent the extension or cracking of the foundation cracks in the wall above when the foundation suffers from laying. Plinth beams evenly distribute the load from the wall over the foundation.


One challenge now is to estimate the number of AAC blocks needed for the shed. We ended up underestimating and another tractor had to be sent to town to get more bricks and mortor (mortor is supplied by the AAC manufacturer and considered more effective than using a regular sand + cement mixture for these blocks).
Mortar is a material used in masonry construction to fill the gaps between the bricks and blocks. Mortar is a mixture of sand, a binder such as cement or lime, and water and is applied as a paste which then sets hard.

We used locally available kadapa stone at lintel level for windows and doors. After completion of brick work, a welding team arrived to install the roof.

Doors, windows and tile work had to wait so they can be completed along with the main house work. This structure is now good enough to apply for an electric connection. Construction material like cement also now have a home.
The AAC blocks costed around 110 Rs per block (branded AAC blocks like Birla Aerocon can cost upwards of 150 Rs per block). We used 300 of them for building a 150 sq ft shed room. Five JSW Coloron metal sheets costed around 14k. Add the cost of labour, mortar, sand, cement, rock and other materials, it costed us a little less than 1 Lakh to build the shed.
Electricity Connection
The local lineman helped with the process. An application submitted at the local panchayat was all the paper work needed. It took a month but got a single phase connection in the end.
The process may be complicated and costly if there are no passing electric lines near your farm land.

One issue I later discovered with having a step down transformer supplying to a single house alone is high voltage. We measured voltage consistently above 260v. This required a 5 KVA stabilizer when we got down to wiring the main house.
Borewell Motor
We could now go ahead and install a Single Phase Taro Submersible Pump with Ashirvad uPVC column pipes. The motor, material and installation can cost up to 1 Lakh INR.
There is now a secure water supply for starting house construction work. We had to rent a water tank (Tractor Trailer) and keep at site till this was functional.
Closing Thoughts
Land Development costs should be an important factor in your selection and purchase of land. Is the access road usable and free of disputes? Are the boundaries clear? Is the land levelled and ready for use? Should fencing be done? Or are there any natural fences already in place? What are the sources for water and electricity? Is there a temporary structure already on the land? What is an estimate of land development budget in addition to the cost of land considering all these factors?
Most of these notes are written in retrospect and after making mistakes. We were especially unprepared for most of the land development costs but had to invest in them anyway. Many hours were also spent on reading and watching videos (YouTube, mostly). Pinterest also proved to be a good source.
- How to build a shed?
- What Engineers mean when they use words like plinth beam, lintel beam?
- How borewell drilling works?
- How ground water system works?
- Advantages and disadvantages of AAC blocks?
- How water diviners and geologists figure out ideal drilling locations?
Read Next: Designing the Farm House
