
The most impactful plus lots of fun!
Concept
Probably, we all grow up nurturing some vision of our ideal home. The inspiration may be a village home where many a summer holidays are spent or a holiday home we stayed near the Beach or Mountains.
Countless memories burst out when I think of our grand parents home. It looks so small now, but it felt like a huge bungalow for us children thronging this place during holidays.

Every wall climbed, every nook and corner of the house used to play games, from hide and seek to hours of card games.

I also rummaged through all our holiday albums to see impressions we collected during our travels.
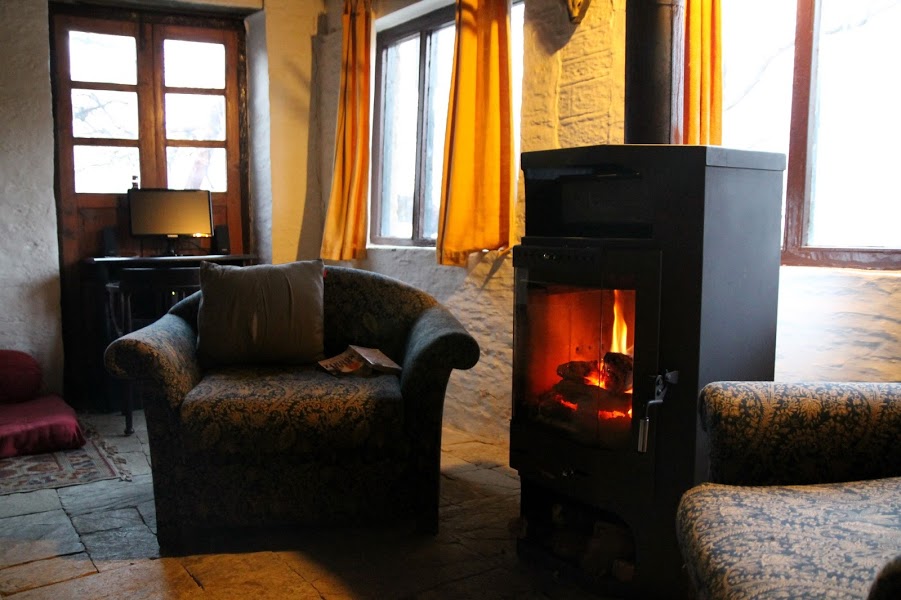
There’s these chairs by the fireplace we spent countless hours reading and chatting.
A bathroom that captures your attention the moment you enter.

A courtyard that integrates so well into many rooms.

A door without an entrance is a work in progress or a beautiful aspect of this wonderful village home?

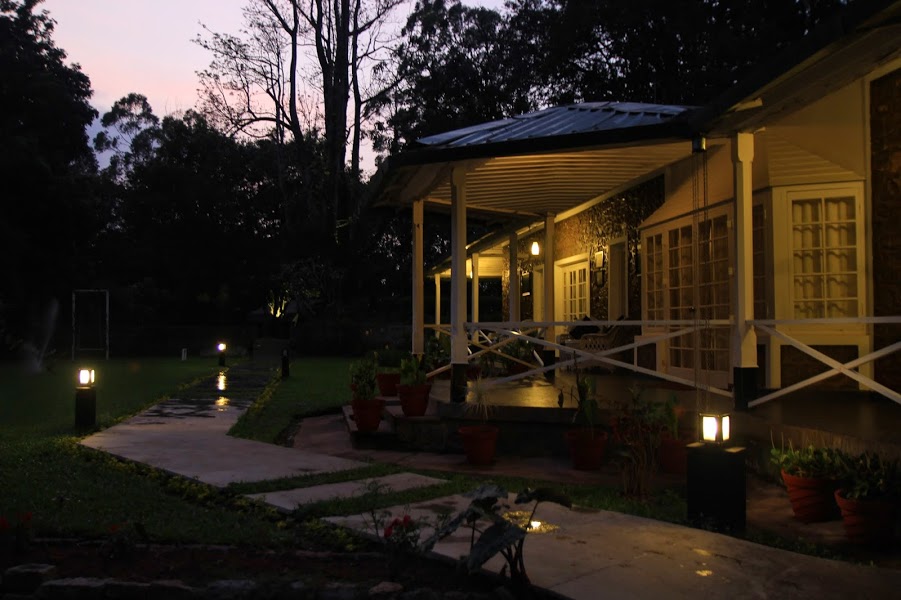
Lighting that shows the subtle side of the house at night.
A kitchen in a monastery that’s functional and kept clean.

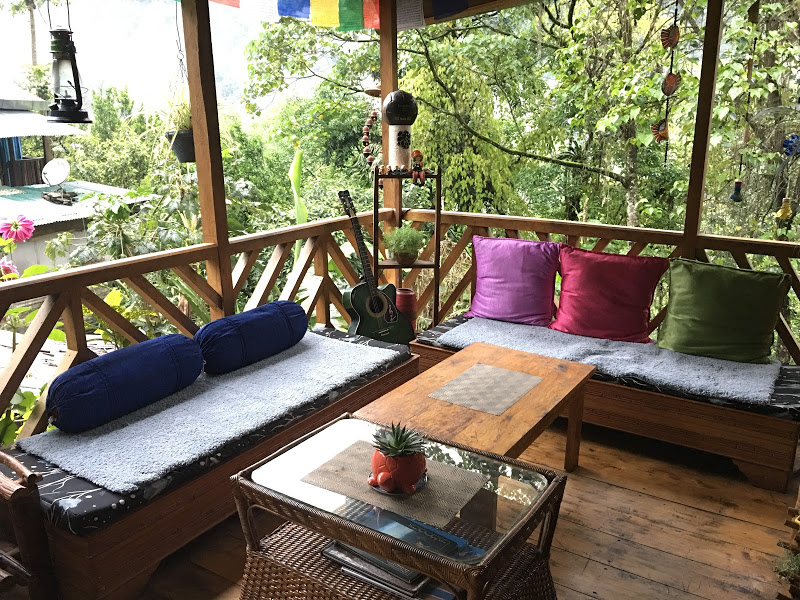
Comfortable places to sit and enjoy views.
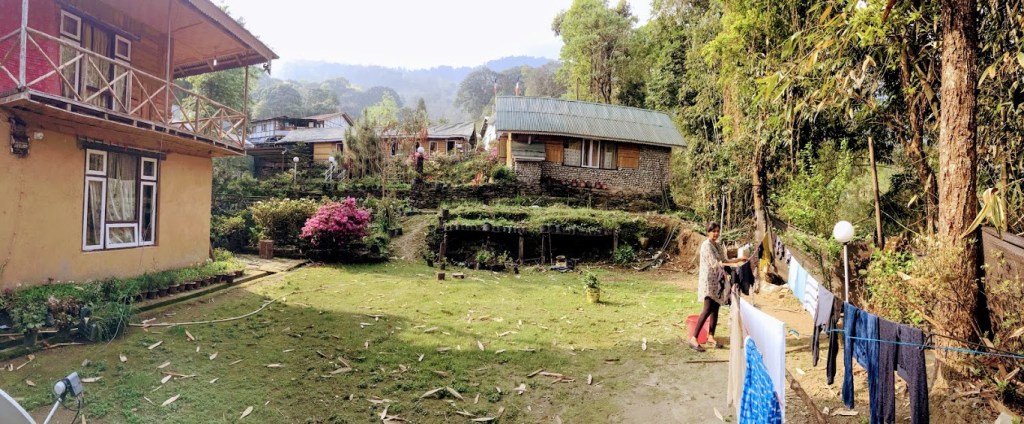
The pleasure of having a dry line for cloths in the sun.
Houses you pass by and so badly wish they invite you for a cup of tea and show their home!

Or spotting beautiful windows without grills.
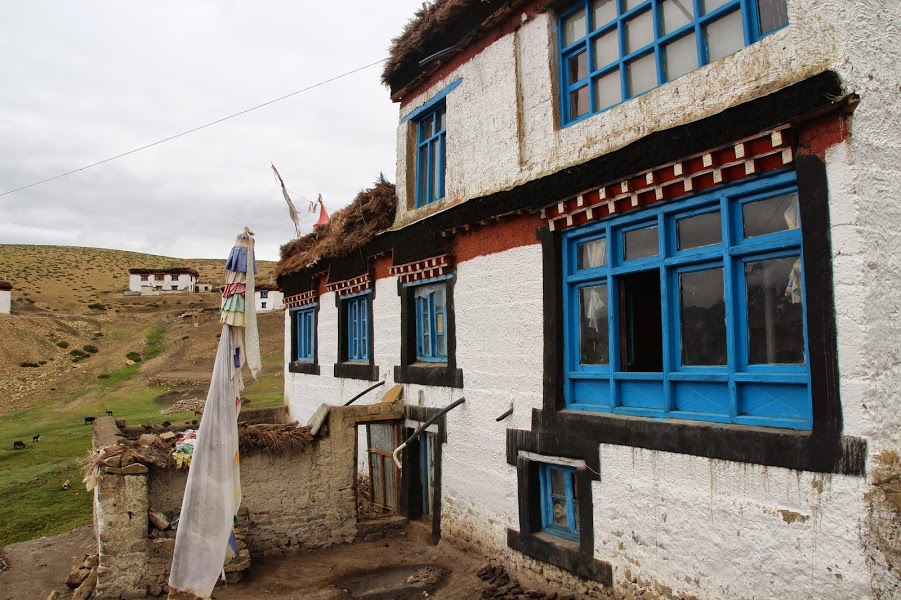
And the forgotten thatched homes.

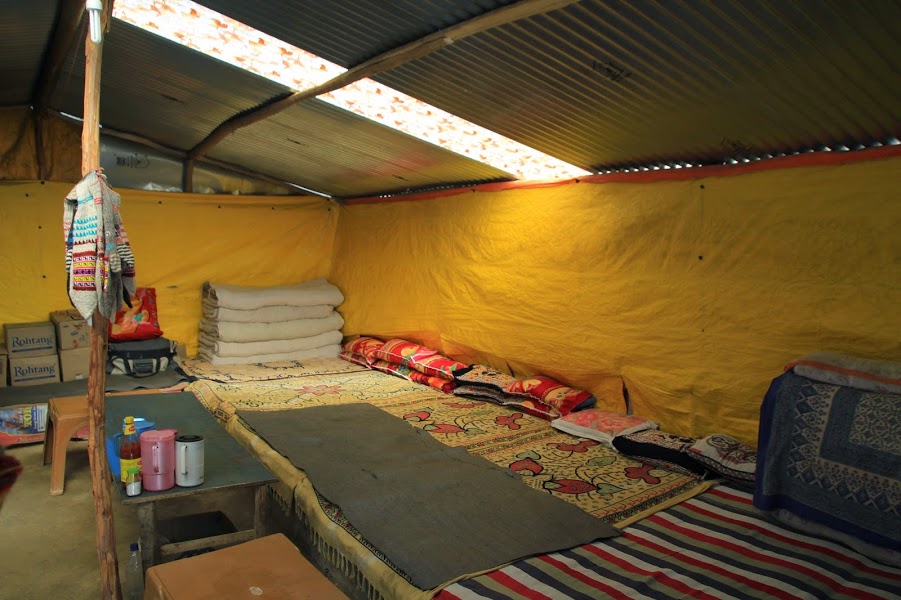
There are inspirations hidden even in a temporary structure selling hot noodles and tea.
All these impressions do play a big role in our visualization of our dream home. Unconsciously, even!
I also had the opportunity to be tremendously influenced by Christopher Alexander’s works The Timeless way of Building and A Pattern Language. I wish these two books are read by everyone starting their “build a home” project.
There is one timeless way of building. It is thousands of years old, and the same today as it has always been. The great traditional buildings of the past, the villages and tents and temples in which man feels at home, have always been made by people who were very close to the centre of this way. This way will lead anyone who looks for it to buildings which are themselves as ancient in their form as the trees and hills, and as our faces are.
Christopher Alexander
At the core of these books is the idea that people should design for themselves their own houses, streets, and communities. One advice we also took from these works is to never have a vision of a house and force fit into the land you buy. It is important the house emerges naturally from the context of the land you have and becomes integral to it.
The recent tiny home movement and YouTube productions like Living Big in a Tiny House also had a big impact on our thinking and design sense.
Architect – Your Best Friend
We were lucky to find an Architect, Maya Herzberger, who engaged with us in many conversations and patiently helped bring the idea to something concrete on 2D/3D.
First inputs we could give Maya to help start the conversation:
1. A sense of budget (15 lakh INR)
2. Core needs/requirements
3. Some existing designs/house plans that we liked
4. Construction technology/material choices we prefer
Maya embraced these constraints (budget, core requirements. nice-to-haves’) and we started on a creative and innovative journey that we ended up loving so much.
We set about designing a house that’s only 500 sq ft of living space and yet provides spacious spaces to cook, eat, work, read and sleep. Rain water harvesting and solar energy were some specific needs. And nice-to-have’s like outdoor shaded space to rest when doing gardening work.
We also wished the design to accommodate eco-friendly ways of construction. We also set about designing a house that takes very little time to build. These and many more ideas were improvised/dropped as the conversations happened.
Maya listened to all our ideas and summed it all up beautifully: a house that’s modern, minimalist and functional.
Design Process – Iterative and Incremental
Maya guided us over four iterations of the design. While the first iteration helped clarify the core requirements, subsequent iterations flushed out the details. Having a model to play with at the end of each iteration really helped us “look” at it and share our thoughts clearly.
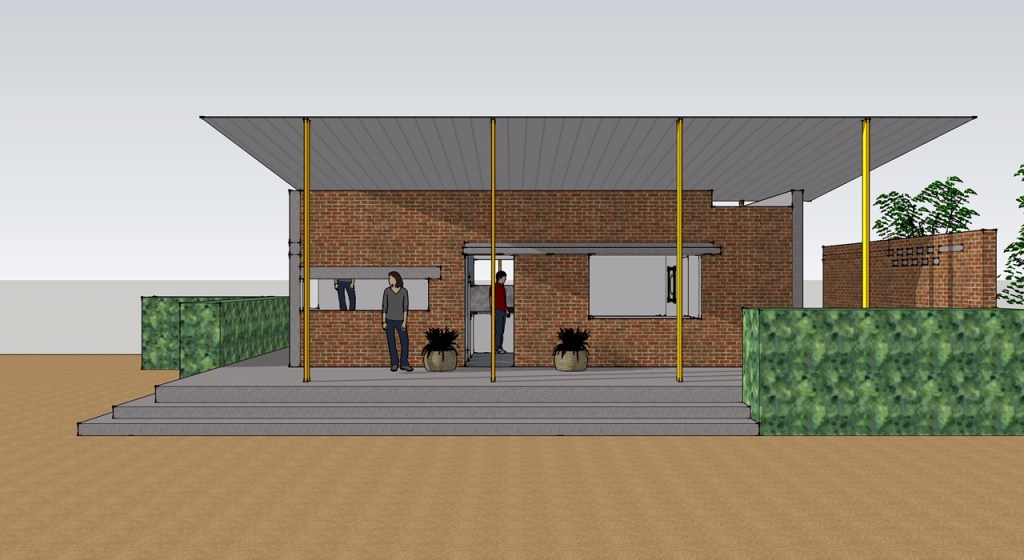
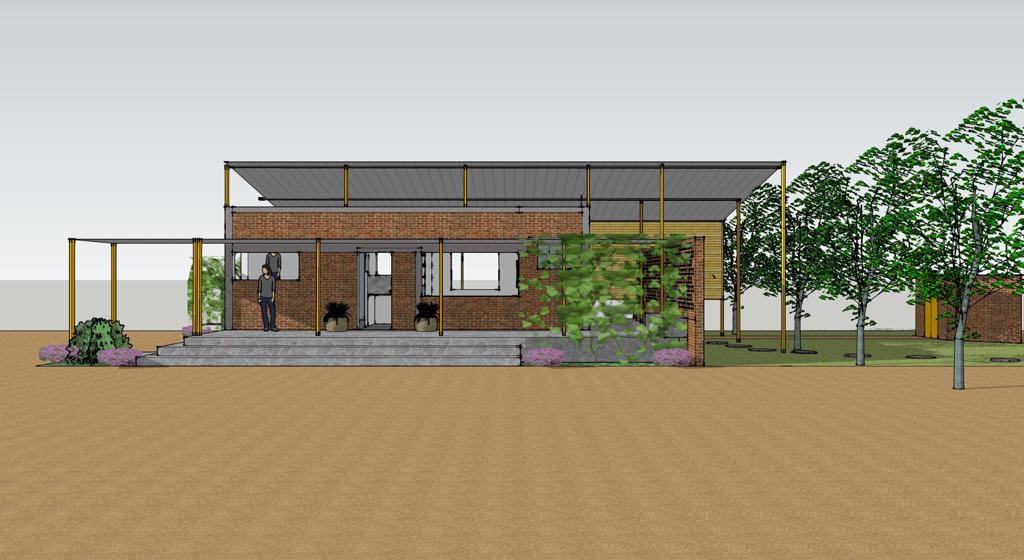
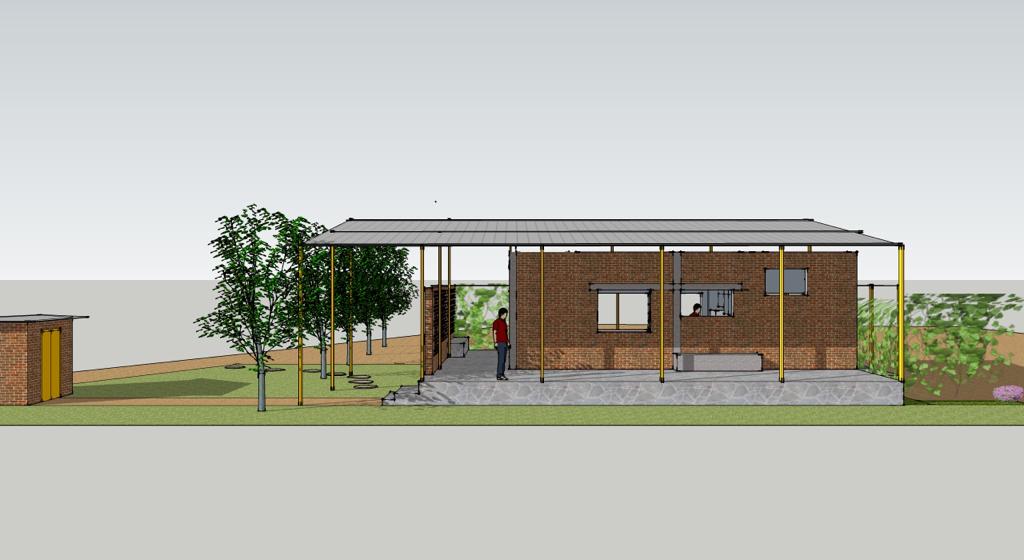
One of the first designs that emerged is this:

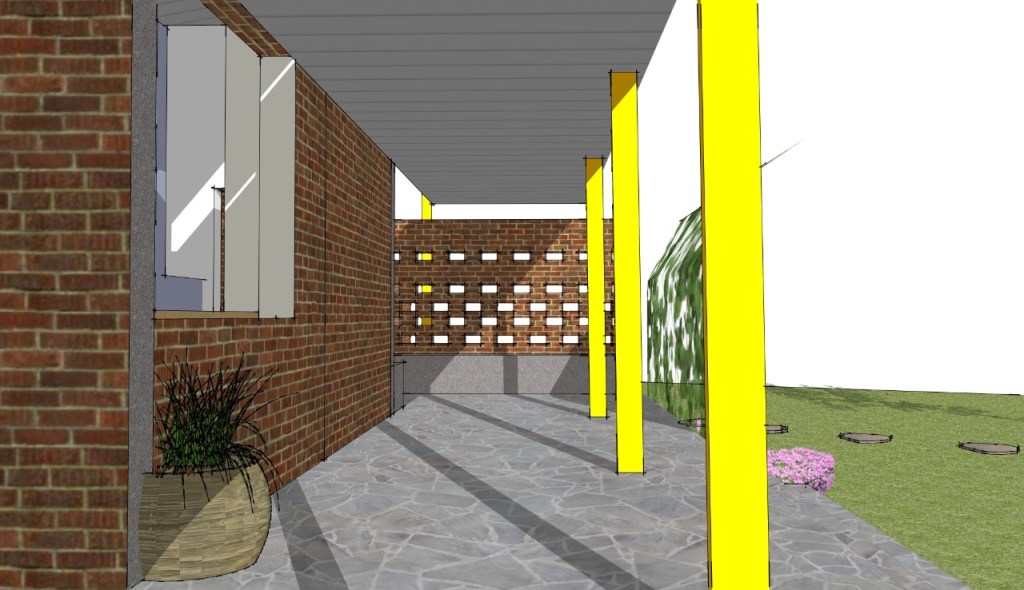
This design is a north facing 325 sq ft brick box with a double roof – the extra steel canopy shades the building and verandahs all around. Jali walls on the west side provide spaces to sit while also protecting the house from evening sun.
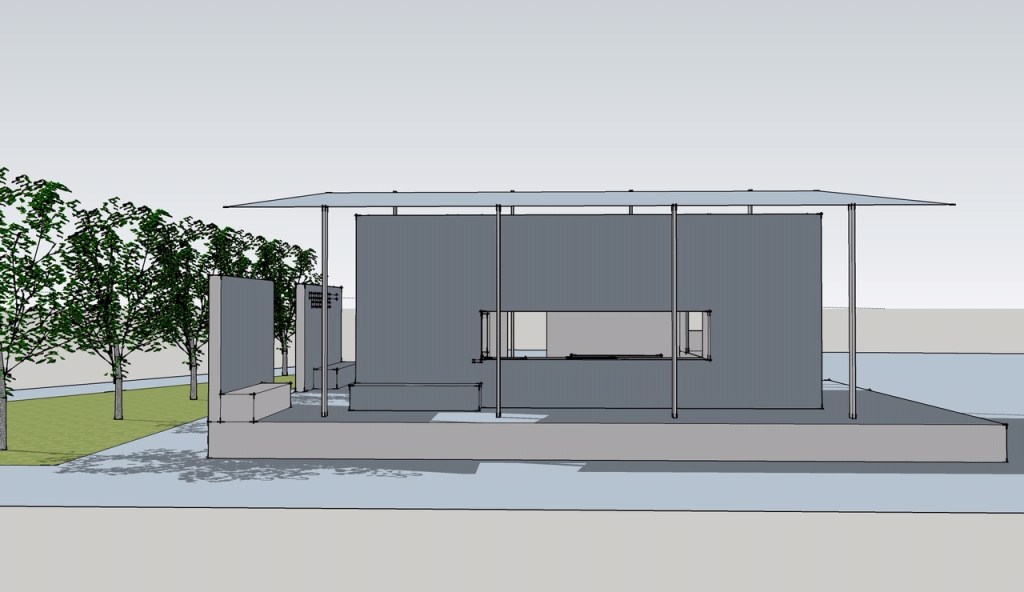
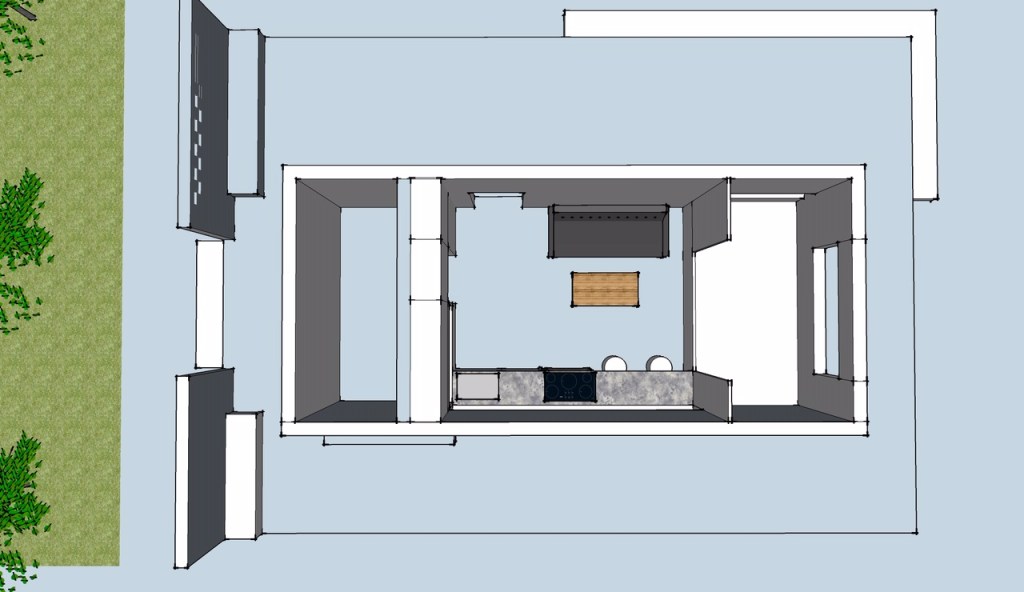
There is a bed alcove facing east. The bathroom is the room towards the west and in between there would be a wall of storage. A kitchen bar/desk/ dining table runs the length of the main space.
Around this time, we considered some inspirations from “The Pattern Language” book. “Patterns,” the units of this language, are answers to design problems (How high should a window sill be?). While more than 250 patterns are in the book, Maya helped identify around 25 of them that relate to our design context. We strived to bring these elements into the design.
Here on these pages, I tried to provide more details for some of these patterns. Click on each to read about the pattern. I really hope this tasting will help you go grab the books. They will be a constant companion for the design and construction phase of your home! They will become the language you and your Architect will converse in!
- Positive Outdoor Space
- Main Entrance
- Entrance Transition
- Car Connection
- Hierarchy of Open Space
- Sheltering Roof
- Intimacy Gradient
- Entrance Room
- Zen View
- Sleeping to the East
- Farmhouse Kitchen
- Outdoor Room
- Connection to the Earth
- Garden Seat
- Vegetable Garden
Of the 250+ patterns outlined, first 94 patterns are what the authors call global patterns which define a town or a community. You can start reading from 95th pattern as well. And start ticking the patterns which are relevant to your own project. For example, if you have a teenager, the “Teenager’s Cottage” pattern can be selected. Or if you wish to have a work from home space, you can incorporate the “Half-Private Office” pattern.
These discussions helped us move to a second design iteration.
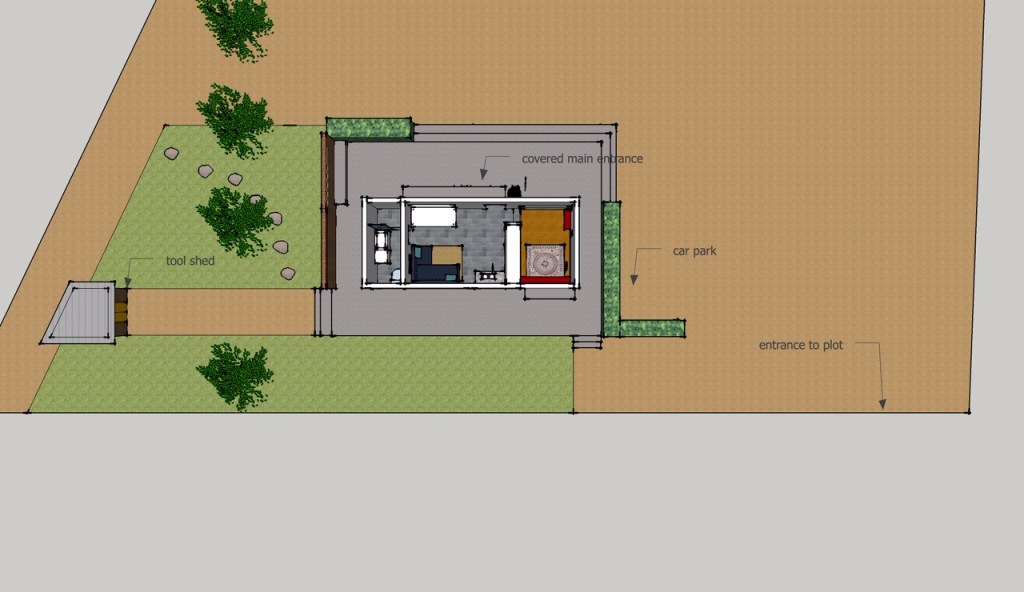
The big green boxy indications in the plan would be hedges. They were meant to give definition and enclosure to the outside space.

The bedroom floor height is now raised by 8 inches to distinctly separate it from the living space. This also has the advantage of reduced ceiling height and therefore, make the space feel more private and cozy. Storage wall is now planned between bed alcove and main space. It will provide wardrobe storage for the bedside and kitchen cabinets the other side, while also functioning as an internal wall. A workspace table is added with a window view into the farm.

For the next iteration, more storage spaces and providing a sense of transition upon arrival into house was discussed.

The bedroom wall is now moved out by 15” to double the storage between kitchen and bed alcove. There is now a full 15” deep wall (9’ wide up to ceiling) of shelving for clothes and books.
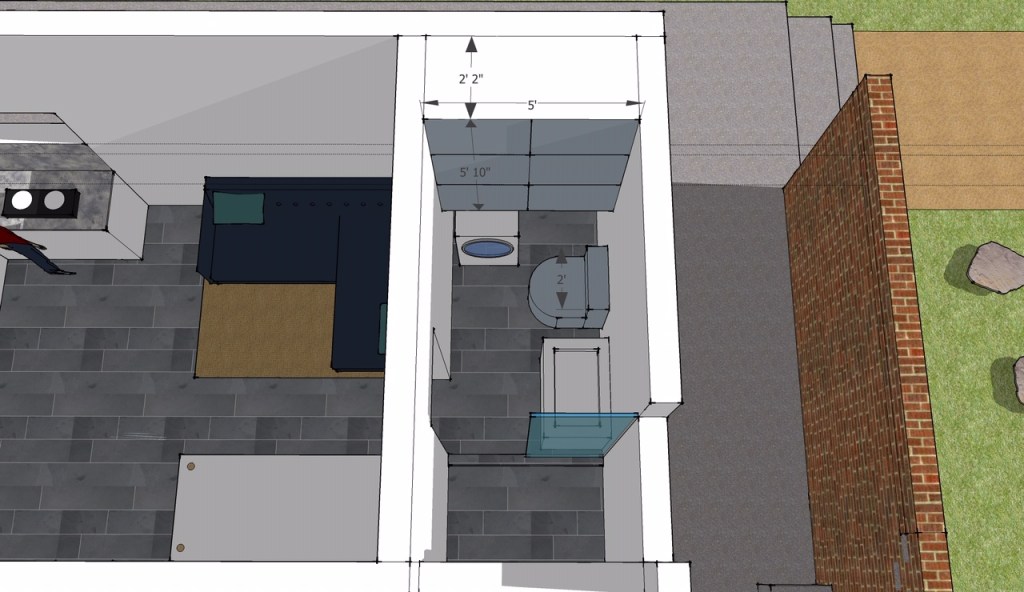
This design also rearranged the bathroom and added storage above the washing machine.
Around this time, we also discussed construction costs. Design decisions at this stage can have a huge impact on construction costs. Here’s a sample of such possible discussion points:
- Apart from bricks, doors and windows are a key cost to the project. Will costs come lower if we procure standard size doors and windows and incorporate their specs into the design? One option is Tata Pravesh doors and windows.
- Moving washing machine to tool shed – bringing water and electricity to the shed will be an added expense. Something to consider.
- Water Tank and Sump Tank location and costs. Option of using a loft tank in the bathroom to save costs.
- Septic tank: which one to go for? Build or buy?
Next iteration of the design has more pronounced ideas. Spaces were adjusted to accommodate some existing furniture we owned.


Around this time, Maya also provided CAD drawings of the house – detailed enough to get an initial estimate of construction costs.
Estimation of Cost and Timelines
A Civil Engineer friend helped do the estimates for cost and timelines. This dialogue with the Engineer really helped me get back to the design board with some ideas to reduce the construction costs. For example,
- We decided to do the metal roof for rain-water harvesting in a later phase
- We decided to not have the concrete bed behind the house and just use the space for a kitchen garden
Maya worked out a final design based on these discussions.


One important change Maya suggested in the final design is to bump out the north wall of living and bathroom space and push out the working space plus provide additional wardrobe/storage space near the bathroom. In retrospect, this worked out beautifully when the final house came along. She also placed a ventilator window above the bed and this design change also came out very well finally!
It’s time to put the design to some test and declare GO.
It’s a GO
Using some sticks and stones at the site location, we marked the locations of spaces in the house. And walked around to get a sense of the space and feel of the house. Everything looked good. It’s a GO.
PS: In case you were wondering about the tool Maya used to make the 2D/3D models shown on this page, it’s SketchUp. a simple to use 3D modelling software. I ended up loving the tool so much, I tried a Udemy Course to learn how to use it myself. Do note that only a web version with basic features is free, but that’s good enough to take it for a spin.
Read Next: Building the Farm House
