
Project Management skills tested!
Your project management skills are most important to keep the spending in check and timelines inside the critical path. One also needs a ton of patience as things rarely go as planned. But it’s lots of fun if you are ready to jump in and work with every team at site.
Finalizing the Construction Model
I looked for guidance at Auroville Workshops and participated in webinars like “How to build your home with net zero investment”. And Natural Building workshops of Thannal. I also took copious help from Meenakshi Akka who is an Architect and runs Puvidham school.
For the walls, there are multiple options I considered.
- Wood structure
- Rammed earth walls
- Compressed mud blocks made at site
- Wire cut red bricks
- Steel skeleton with insulation panels
- Hollow clay bricks
For roofing, I considered:
- Concrete slab
- Onduline
- Sandwich panel
- Metal
It is possible to consider many permutations for the walls and roofing. Examples: Rammed Earth walls with Sandwich panel roof, or, Wire cut red bricks with concrete slab.
I could meet a team experienced in wood cottages at a project they were working near Horsley Hills, Madanapalle.

They import wood panels and use Onduline material for roofing. This is probably the fastest construction option. Once foundation is done, they promise to erect the house in under 2 weeks. Costs (they charge around 2000 INR per sq ft), pests, and fire concerns and a few other reasons prevented me from going ahead with this option. But I came back impressed with Onduline roofing and made a mental note to try them some day.
Due to Covid-19 situation during the time of my construction, I could not invite skilled labour who are good with rammed earth or compressed mud block based construction too.
Some companies whom I contacted for steel frame based construction did not respond either. It is likely they are more interested in big projects like resorts and warehouses.
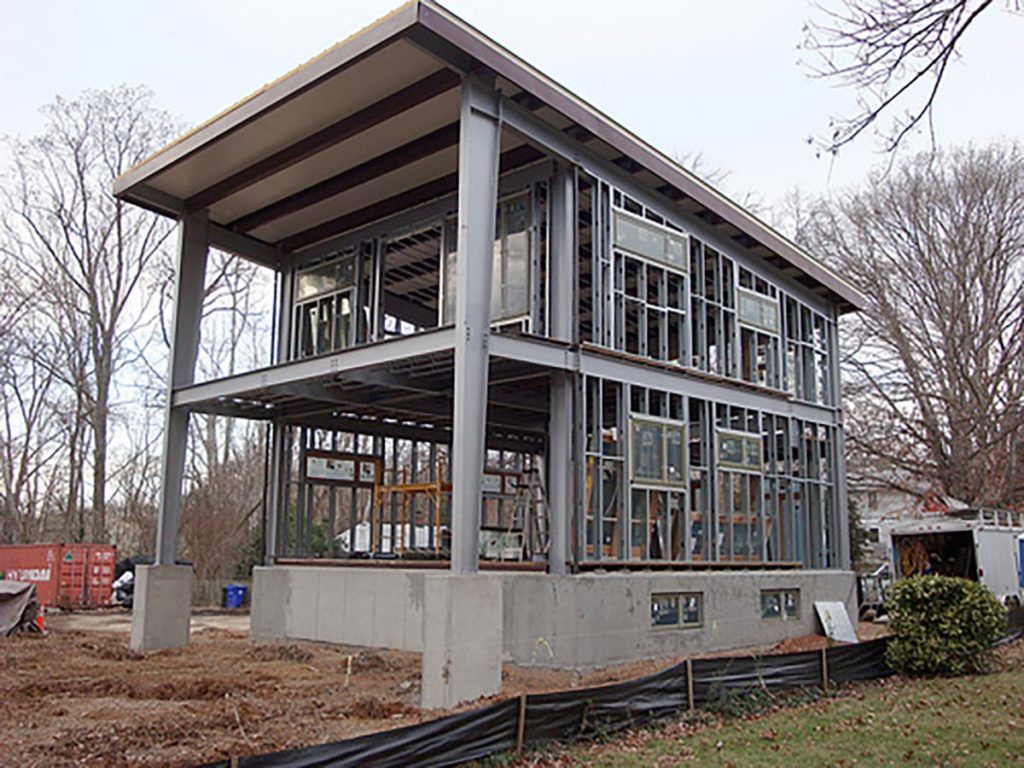
In the end, if I had to consider what is possible to do with locally available skills and labour, I had to go with a RCC structure. And use hollow clay bricks for walls.
An RCC building means the main structural members of the building, viz, slabs, beams, columns and foundations are made up of reinforced cement concrete.
Reinformed cement concrete (RCC), is a composite material in which concrete‘s relatively low tensile strength and ductility are compensated for by the inclusion of reinforcement (Steel) having higher tensile strength or ductility.
A google search sent me to Weinerberger Porotherm Bricks (hollow clay bricks). I fell in love with them and ordered them immediately. They have a factory in Kunigal near Bengaluru and less than 150 km away!
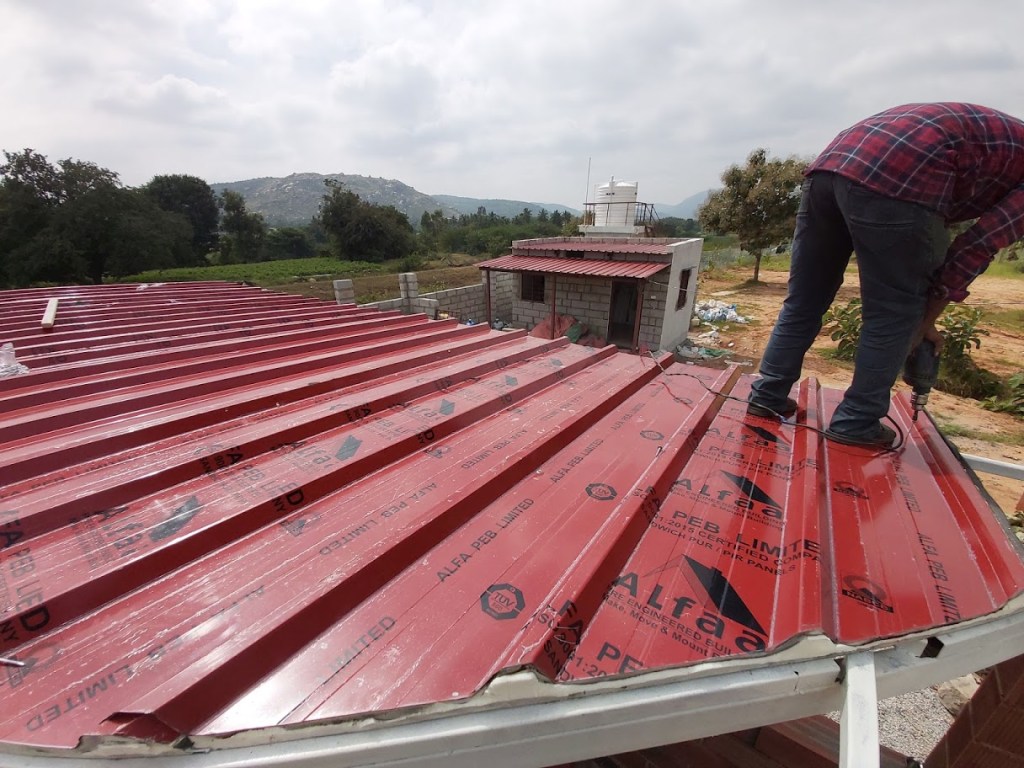
So, we settled for a RCC building with hollow clay bricks. A hybrid roofing structure is adopted – with sandwich panel roofs for verandah. A friend suggested AlfaPEB in Bangalore and I could order Sandwich PUF panel roofs from them.
With the most important decisions taken, it’s take-off time.
Your Civil Contractor
You have two choices:
1. give a material + labor contract (or)
2. procure all material yourself and work with a Civil Team.
Decision was actually made for me as few material (cement, sand, steel, gravel etc.) + labor contractors in Madanapalle I contacted did not show interest in the project as the budget is below 20 lakhs. Also since the site is 14 km away from Madanapalle (the nearest town), it might come with some logistics issues for them. A team from Bangalore I contacted said they work only on projects above 30 lakhs. But do check them out if your budget is above 30 lakhs.
I finally went with the same Civil Contractor who built the shed. I enjoyed working with him and his team during the shed construction. Though his team takes shortcuts when he is not around, I committed to be at site at all times and keep a check on works.
The contractor agreed to build the foundation, pillars and roof for a fixed price (around 1.5 lakhs for 550 sq ft main house). Other works like brick walls were excluded from this contract (as the team has no experience with Porotherm hollow clay brick work and hence could not estimate), a daily wage based agreement is made for wall construction.
A friend suggested a cement and steel vendor close by to the site. It came with some convenience – you can just call him and required cement or steel is sent immediately with the option to settle bills weekly or bi-weekly.
You should also make arrangements for sand, stones and gravel. I ended up using 40 tractor loads of sand, 20 tractor loads of stone and 12 tractor loads of gravel. Cost of one load varies from 2000 to 4000 INR. Their continuous supply as needed is critical to timely completion of the project. Finding a good supplier of sand, stones and gravel is very very essential for quality in construction.
Plan Approval from Panchayat
I took the plans to a local Architect and he used Maya’s drawings to make and print documents that Panchayat office needs to accept and approve my plan. It took couple of follow-ups and visits, but got the approval from Panchayat in two weeks.
Structural Engineer Consultation
My Civil Contractor suggested a local Structural Engineer whose help I took to get details chalked out for foundations and pillars. It helped the Civil Contractor and Structural Engineer understand each other – the Engineer produced drawings the contractor could read and follow easily.
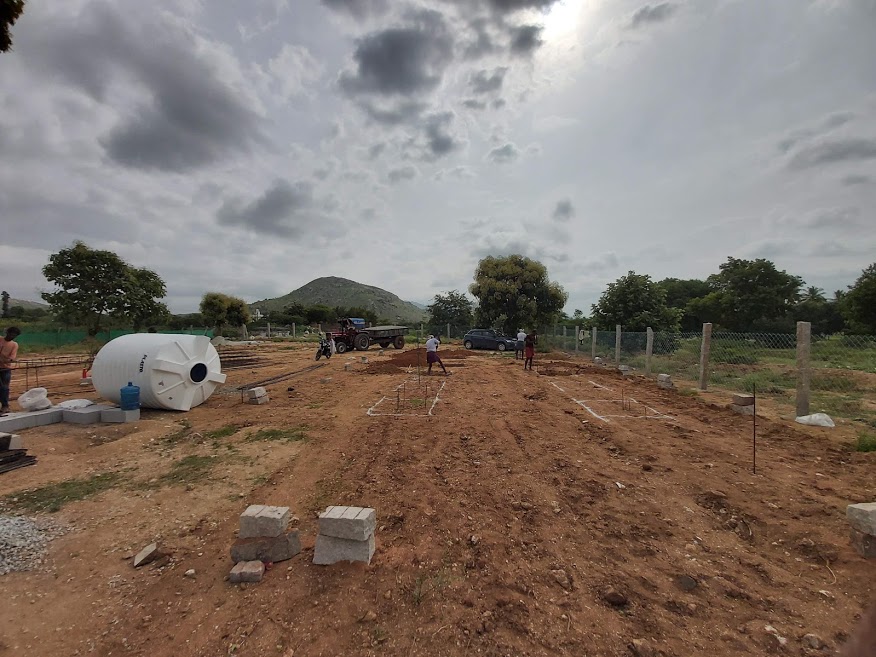
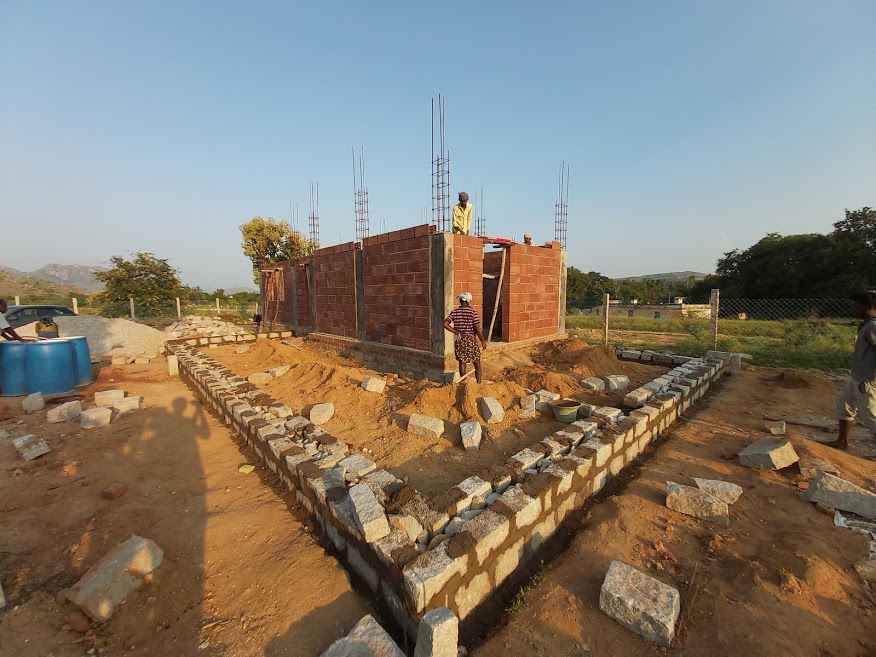
Foundation Work
One beautiful day, the Structural Engineer and Head of Civil Team set about marking the foundations and kick-started the work.
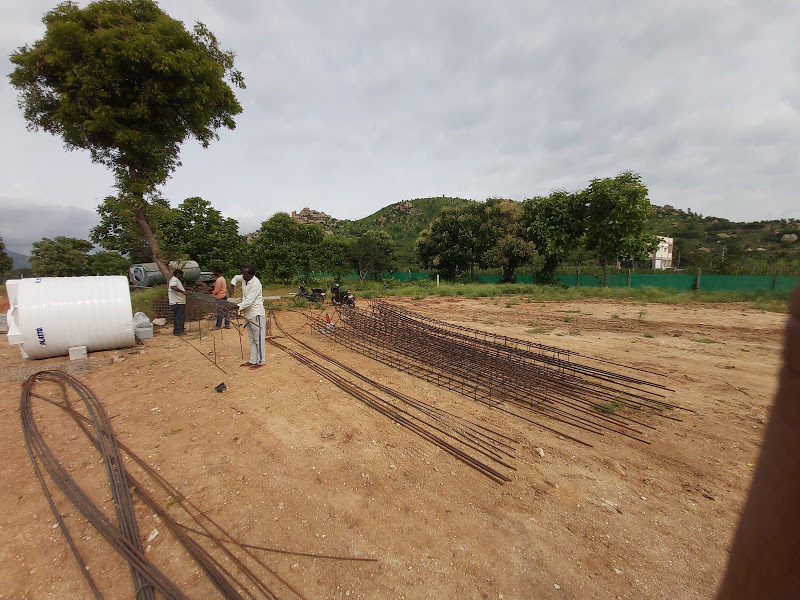

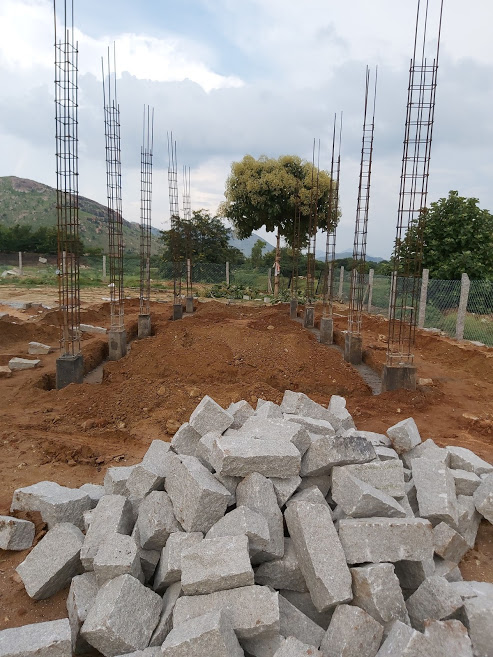

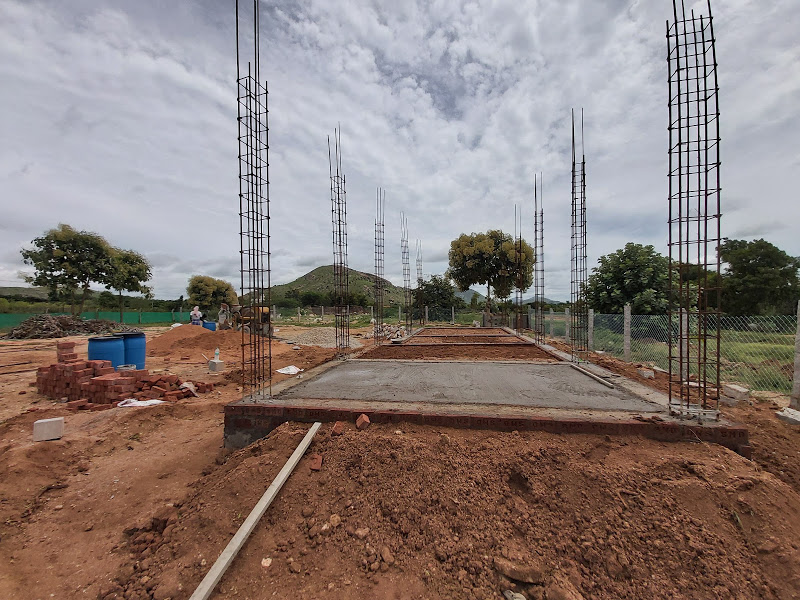
Plinth Beam
The plinth beam is the first beam to be built after the foundation.
A plinth is a base or platform that supports a plinth, column, or structure. Structurally, the plinth distributes weight and pressure down evenly across a column across a wider space.
The plinth beam is a reinforced concrete beam built between the wall and its foundation.

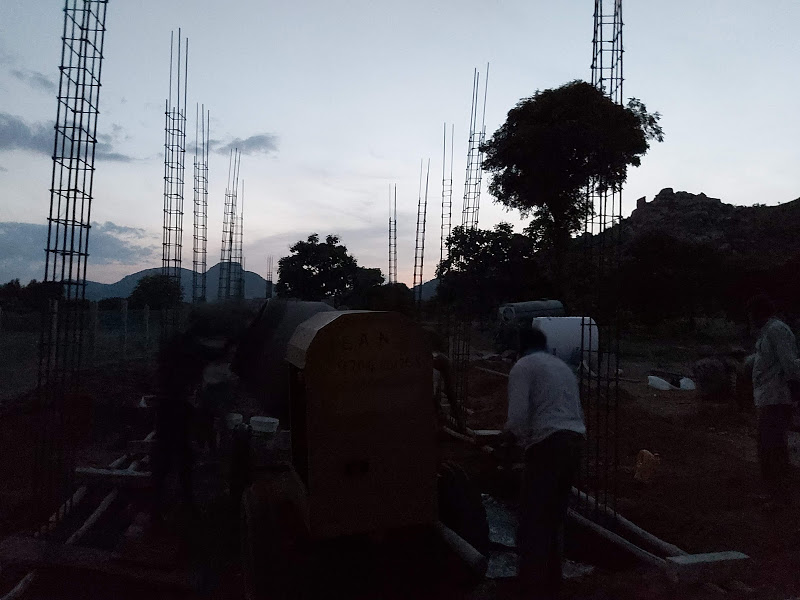
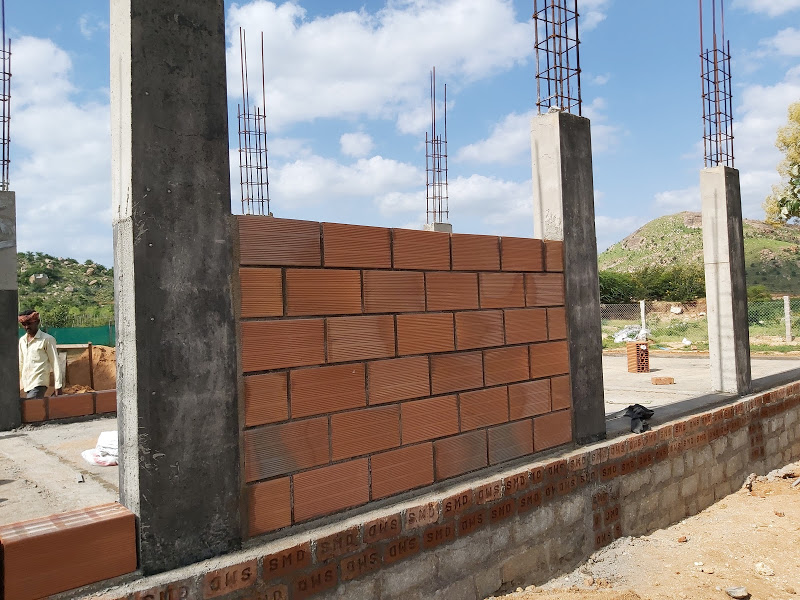
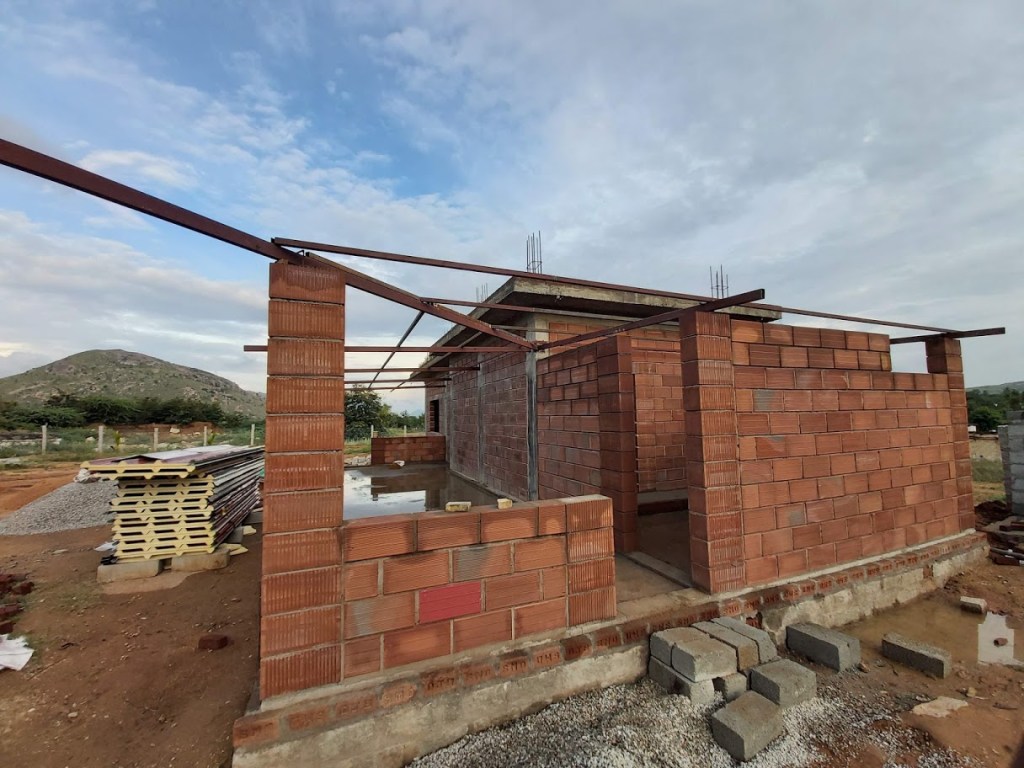
Raising Pillars and Walls


Lintel Beam
Lintel beam required or not?
A lintel is a beam placed across the openings like doors, windows etc. in buildings to support the load from the structure above. The width of lintel beam is equal to the width of wall, and the ends of it is built into the wall.
The Civil Contractor initially suggested to raise the pillars and then cast the concrete roof. He wished to work on the walls only after the roof is in place. However, I agreed with a couple of friends who suggested to build a tie beam (at lintel level). If this has to be done, wall has to be raised to lintel level first.
We also did something interesting.
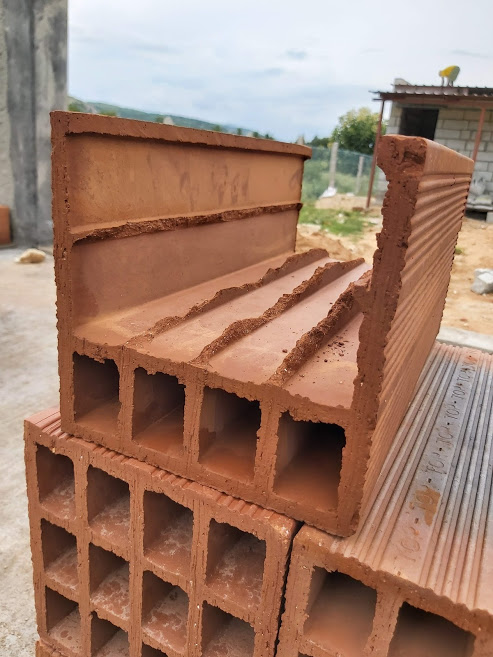
The top of the hollow clay bricks were cut. This provided a compartment to hold the reinforced cement inside. These blocks were then used at the lintel level. This helped conceal the lintel beam.

Design Changes
It is around this time, we made some changes to the design. The kitchen is moved to the south east corner. Bedroom to south west. Bathroom moved to the leg of the L shaped verandah. Verandah to be covered with walls and windows instead of leaving it open to the farm. These changes meant:
- No internal walls in the house.
- A bookshelf will separate living and bedroom spaces
- Only ventilator windows for bedroom with borrowed lighting from the living room
- A large bathroom cum utility area
- All-weather verandah with protection from mosquitos, insects, birds, frogs, snakes …
Thankfully, the changes were thought out and planned at the right time. Any further construction would have made these changes difficult to implement.
Also, the changes almost invited themselves. Guess watching the physical space take shape over a period of time lets one connect with it and see what works better. I ensured I vetted these changes with Maya before going forward. The changes did not warrant vetting with the structural engineer though as the main structure remained same.
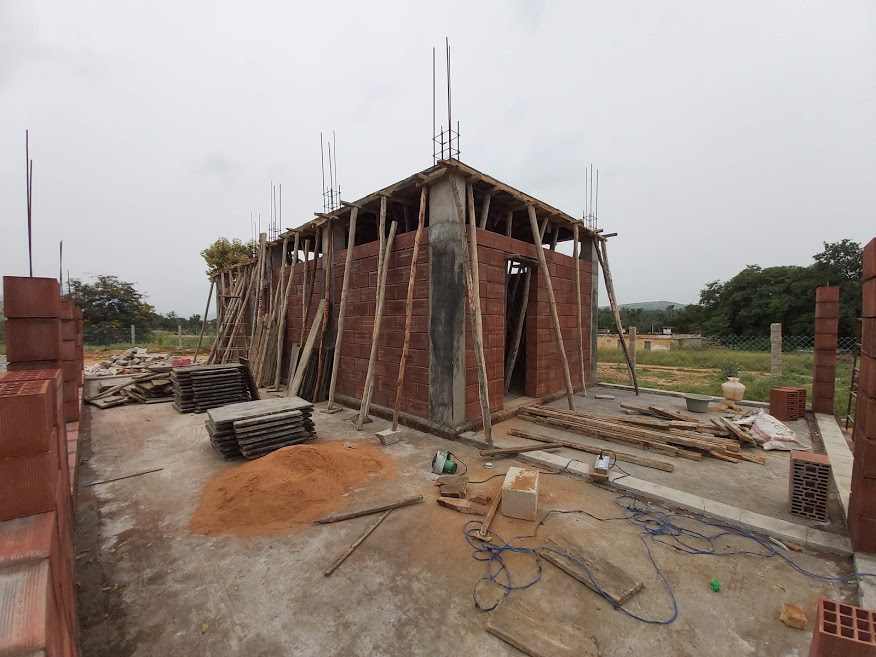
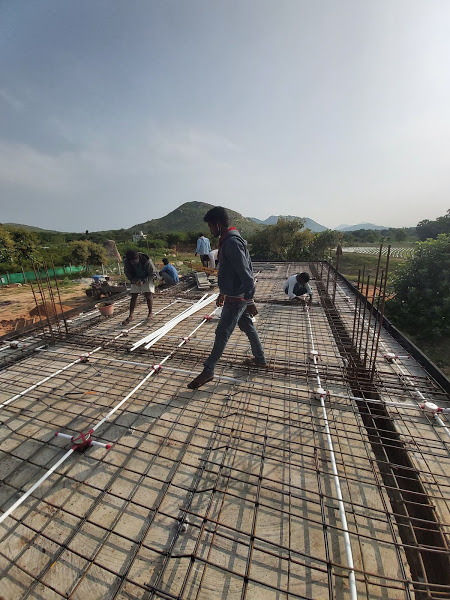
Concrete Roof
Roof work started soon after completing the lintel beam. A team arrived and installed the framework.


Septic Tank
After some research, we installed a Bio Digester Septic Tank made by MAK Bio Projects.
In conventional toilets only 30% of human waste is degraded and other 70% remains in the septic tank. In a bio-digester human waste up to 99.9% gets digested by Anaerobic Microbial Inoculum filled in the bio-tank and gets converted into reusable water and methane gas.
The septic tank and 200 litres of inoculum arrived one morning from Coimbatore. It took a JCB to lift and install the tank into a pit dug beforehand. A crane would have been better!


Installation of Windows and Doors
In retrospect, I have a suggestion. Do plan and order your windows and doors right after foundation work is completed. Though we planned to use ready-made Tata Pravesh doors and windows, standard sizes are not kept in stock, at least in towns like Madanapalle. And they require 60 days to take measurements and deliver to site. That and not so responsive sales contact assigned to me closed the doors on Tata Pravesh.
Without ready-made solutions like Tata Pravesh, one has to do lot of running around and make lot of decisions, which can exhaust one. Good welding team. A good carpenter. Door Panels. Doors and accessories for doors. Windows. Glass to use on windows.
A friend suggested Fero Doors, based in Kerala. I ordered some standard size doors from them. They were slow to respond due to Covid lockdown issues but managed to ship from Kerala to AP. When the doors finally arrived, we could use only one of the four doors ordered. When the other doors were cut to size, we realized were unusable as the doors have hollow holes in them (maybe a design that helps doors from warping). They were actually meant to be used as is with little scope for trimming to site needs. We ended up buying some standard wood doors and laminate sheets in Madanapalle. A carpenter saved the day for me. I also contacted DuraDoor team for door options. Cost and long delivery schedule did not work out in the end.
For door frames and windows, we used a metal fabricator in Madanapalle. This is not a contemporary decision, especially in case of windows. Many use uPVC windows – which are easy to setup and install. But they still need a metal grill installed for safety purposes. To avoid working with two providers (welder for grill, contractor for uPVC), I decided to go with metal windows. I got metal windows made to order with a simple grill design in the middle, mesh frame facing inside and glass frame facing outside house. Once the metal team delivered the windows, red oxide paint is applied and sent back to Madanapalle for fixing glass and mosquito mesh. It took a day to install all of them.
Tiling Floor
What tiles to use is another major decision. We considered:
- Granite flooring
- Vitrified tiles
- Bethamcherla tiles, which qualify as local material
- Athangudi tiles
- Earthen flooring
Cost of laying the tiles is a significant portion of the tile budget. Taking this into account, we ended up using vitrified tiles with matt finish (to reduce risk of slipping). I could find some vitrified tiles that have a wood texture and they went well with the red porotherm bricks.
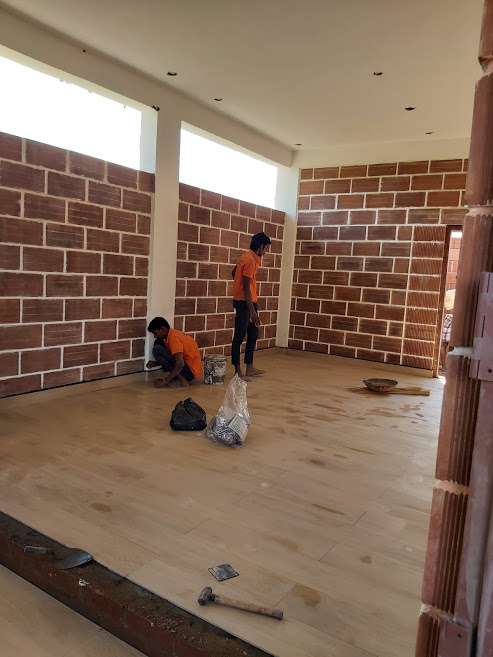
Painting Work
Initial plan was to not paint the porotherm bricks. But the construction of roof and other activities left them with slurry marks. Team from Wienerberger suggested Asian Paints Apex Tile Guard with any choice of shade pigments mixed up. This paint is usually applied on Mangalore roof tiles. The paint is supposed to keep the bricks water proof, dust proof and algae proof.
It is indeed a difficult decision to decide on the color. We made a demo wall and painted it with different shades.

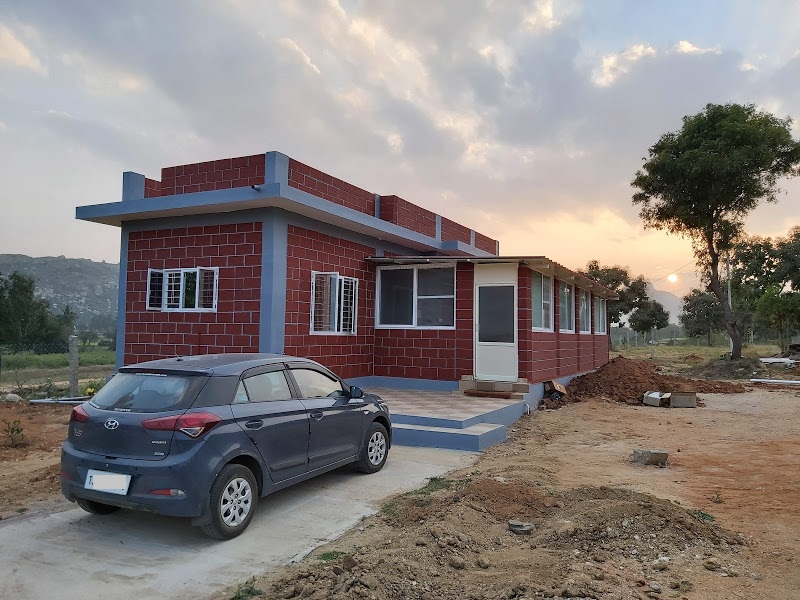
Terracota shade for bricks and steel grey shade for grooves was finalized after much discussions. A PoP mix was used for the grooves between the bricks. before painting them.
The ceiling of the house was painted with the typical process most painters are accustomed to. Apply wall putty, rub with sand paper a couple of times,. and then paint them white.
The cost of painting was an unexpected expense. While the material costed close to 1 lakh INR, an equal amount was charged for the labor. And this is for a less than 1000 sq ft house! It probably helps to look out for keeping painting costs minimal during design phase itself.
Welding Team Work
The value added by welding team to your home is something I realize only now. From main gates to installing roof to providing stair cases for main house and water tank to setting up grills for windows and ventilators. It helps if you can find a good Welding Team and stick with them for the duration of construction work.
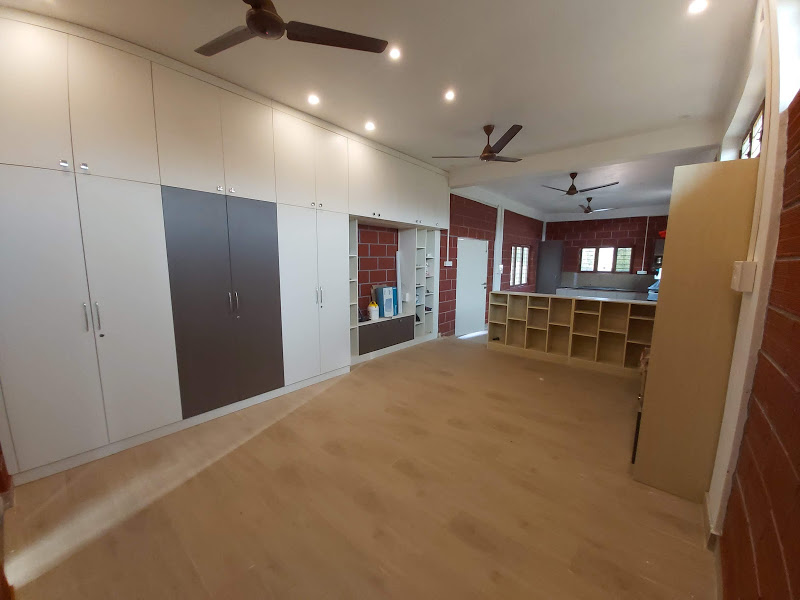
Interiors
We took help from a Interior Consultant in Madanapalle to provide the interiors – kitchen, wardrobe, bookshelf and bathroom cabinet. He in turn worked with a Bangalore agency which got the material ready at their Factory and shipped to site. The installation hardly took four days with a team staying at site and working long hours.


Electrical and Plumbing Systems
We could buy visible electrical and plumbing systems like fans, led lights, sink, taps and faucets from Amazon. They turned out to be much cheaper than buying locally. Rest of items like cPVC pipes and fixtures, wash basins were procured locally.
We created a drip kind of system for dispensing off kitchen and bathroom water. Pipes with small holes in them carry and dispense the grey water into the kitchen garden behind the house.

Electrical work took some time to settle down. We installed a Solar Package from Luminous. This came with an inverter, a 150Ah battery and 2 PV solar panels for around 35k INR. This system switches to solar power in the day time and promises to save a few units every day. And it seems to be doing just that. However, we later realised the house is getting high input voltage (excess of 260v sometimes). We had to install a 5 KVA Servo stablizer to counter this issue. In retrospect, we should have engaged a good Electrical Works Contractor from the day we applied for the electricity connection!
A friend suggested Atomberg fans for the house. They promise up to 65% electricity savings. And I am so happy I bought them. They are working well.
Ready to move in?
While we could complete the house construction in under three months, it took another month to closing in on all minor tasks. Welding works. Painting patch-up works. Installation of uPVC windows and aluminum doors for the verandah.
After moving in, I realized that’s hardly the happy ending. Maintenance works require some of your attention every month.
- Submersible pump has a service schedule you need to watch out for
- Scaling of water heater and plumbing systems is an issue with using borewell water. They need occasional cleaning and maintenance.
- Sump tank and water tank will require periodic cleaning
- Solar panels should be cleaned often
- Batteries health to be checked once occasionally
- Stabilizer and inverter may need occasional servicing
Maybe, more. I hope to reflect on these works soon and share learnings.
That said, our home now offers a space for living comfortably. Hundred places to drink morning tea. As many places in and around house to sit with a book or a friend. Early morning and evening gardening work. Yoga in the long verandah! The home’s there. It’s the outside where you now spend most time! Ironic, maybe, but happy for it.
Read Next: Reflections
